Tailscale - ACL 설정
Tailscale의 Network ACL 구성을 해본다.
Web
GUI
개요
- 보통은 특정 호스트에서는 다른 호스트와 통신을 안되게 할 경우 사용한다.
- 네트워크적으로 ACL(Access Control List)을 만들 때 사용한다.
ref.
Access controls
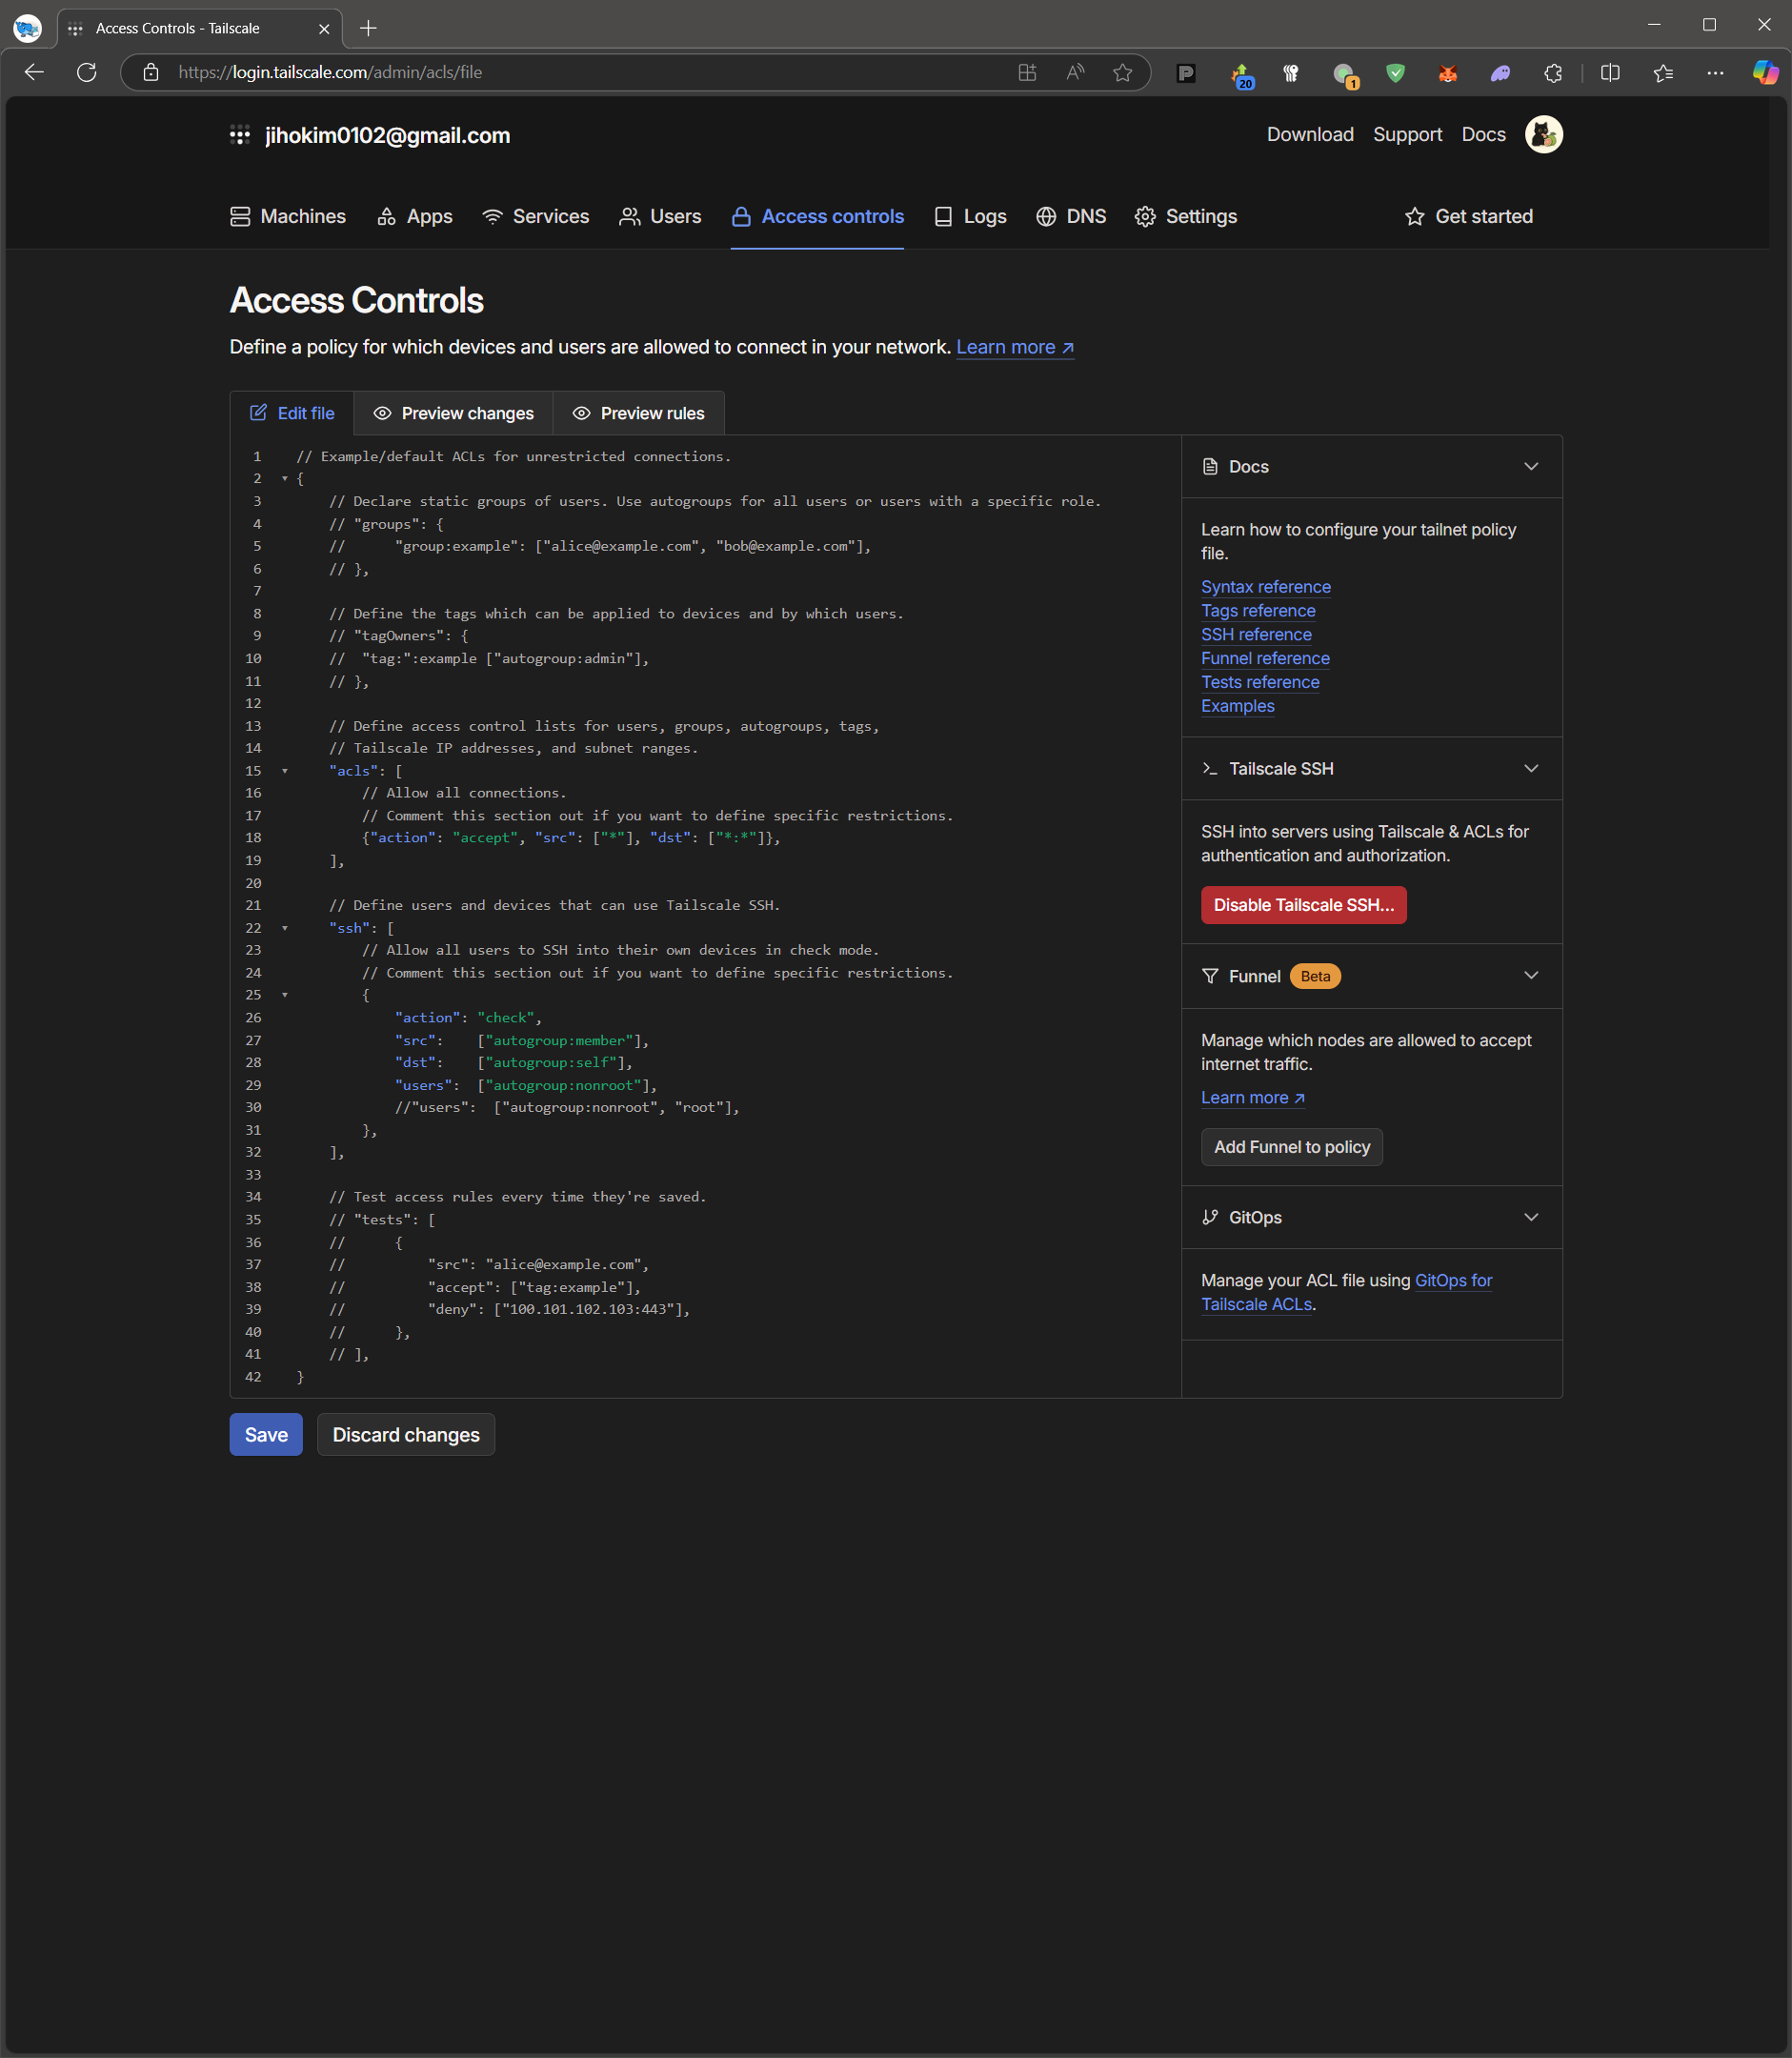
Tailscale에 로그인 후 Console에 접근하면 상단 메뉴에 Access controls이라는 탭이 있다.
여기에 들어가면 기본적으로 작성 되어있는 file이 있다.
 Basic Access Controls
1
2
3
4
5
6
7
8
9
10
11
12
13
14
15
16
17
18
19
20
21
22
23
24
25
26
27
28
29
30
31
32
33
34
35
36
37
38
39
40
41
42
// Example/default ACLs for unrestricted connections.
{
	// Declare static groups of users. Use autogroups for all users or users with a specific role.
	// "groups": {
	//  	"group:example": ["alice@example.com", "bob@example.com"],
	// },

	// Define the tags which can be applied to devices and by which users.
	// "tagOwners": {
	//	"tag:":example ["autogroup:admin"],
	// },

	// Define access control lists for users, groups, autogroups, tags,
	// Tailscale IP addresses, and subnet ranges.
	"acls": [
		// Allow all connections.
		// Comment this section out if you want to define specific restrictions.
		{"action": "accept", "src": ["*"], "dst": ["*:*"]},
	],

	// Define users and devices that can use Tailscale SSH.
	"ssh": [
		// Allow all users to SSH into their own devices in check mode.
		// Comment this section out if you want to define specific restrictions.
		{
			"action": "check",
			"src":    ["autogroup:member"],
			"dst":    ["autogroup:self"],
			"users":  ["autogroup:nonroot"],
			//"users":  ["autogroup:nonroot", "root"],
		},
	],

	// Test access rules every time they're saved.
	// "tests": [
	//  	{
	//  		"src": "alice@example.com",
	//  		"accept": ["tag:example"],
	//  		"deny": ["100.101.102.103:443"],
	//  	},
	// ],
}
이 기본 설정은 Machines에 대해 연결 된 모든 호스트에 네트워크 트래픽이 전달 된다.
이 상태에서 특정 호스트를 제한을 걸고 싶다 한다 했을 경우 보통 config는 IP에 !(NOT)을 걸던가 하는데 그렇게 작동하지는 않는다.
Syntax를 보면 Tag라는 항목이 있는데 이 것을 참고하여 작성 하면 된다.
특정 machine에 네트워크 제한 해보기
아래는 tag를 만들어 특정 machine에 부여해서 특정 machine 빼고는 네트워크를 제한을 해본다.
android라는 machine에 tag를 android로 부여한 뒤 다른 호스트에는 네트워크가 안 나가게 하고, nukumori라는 machine에만 네트워크를 나가게 만들어본다.
작성은 아래와 같이 해봤다.
1
2
3
4
5
6
7
8
9
10
11
12
13
14
15
16
17
18
19
20
21
22
23
24
25
26
27
28
{
	// Define the tags which can be applied to devices and by which users.
	"tagOwners": {
		"tag:android": ["autogroup:admin"],
	},

	// Define access control lists for users, groups, autogroups, tags,
	// Tailscale IP addresses, and subnet ranges.
	"acls": [
		// Allow android to nukumori connection.
		{"action": "accept", "src": ["tag:android"], "dst": ["100.64.0.1:*"]},
		// Allow another connections.
		{"action": "accept", "src": ["autogroup:member"], "dst": ["*:*"]},
	],

	// Define users and devices that can use Tailscale SSH.
	"ssh": [
		// Allow all users to SSH into their own devices in check mode.
		// Comment this section out if you want to define specific restrictions.
		{
			"action": "check",
			"src":    ["autogroup:member"],
			"dst":    ["autogroup:self"],
			"users":  ["autogroup:nonroot"],
			//"users":  ["autogroup:nonroot", "root"],
		},
	],
}
작성 하면 preview changes의 탭에서는 diff와 같이 표시가 되며, preview rules에서는 어떻게 되는지 나온다.
확인이 되면 아래 Save버튼을 통해 저장한다.
추후에 preview rules를 보며 네트워크 동작에 대해서 확인을 해보면 된다.
Tag를 생성했으면 Machines탭에 들어가 할당 할 machine을 찾아준다.
할당 machine에 우측 … 버튼을 눌러 Edit ACL tags… 을 눌러준다.
이후 Add tags를 눌러 tag를 붙여준다.
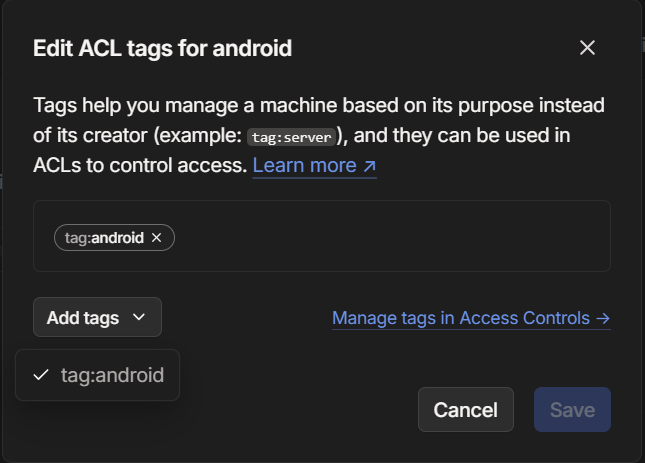 Edit ACL tags for android
이렇게 설정을 해주면 이제 해당 tag는 ACL이 적용된 상태로 된다.
이전의 Access controls 탭에서 preview rules를 보면 특정 호스트에만 접근이 되는 것을 볼 수 있다.
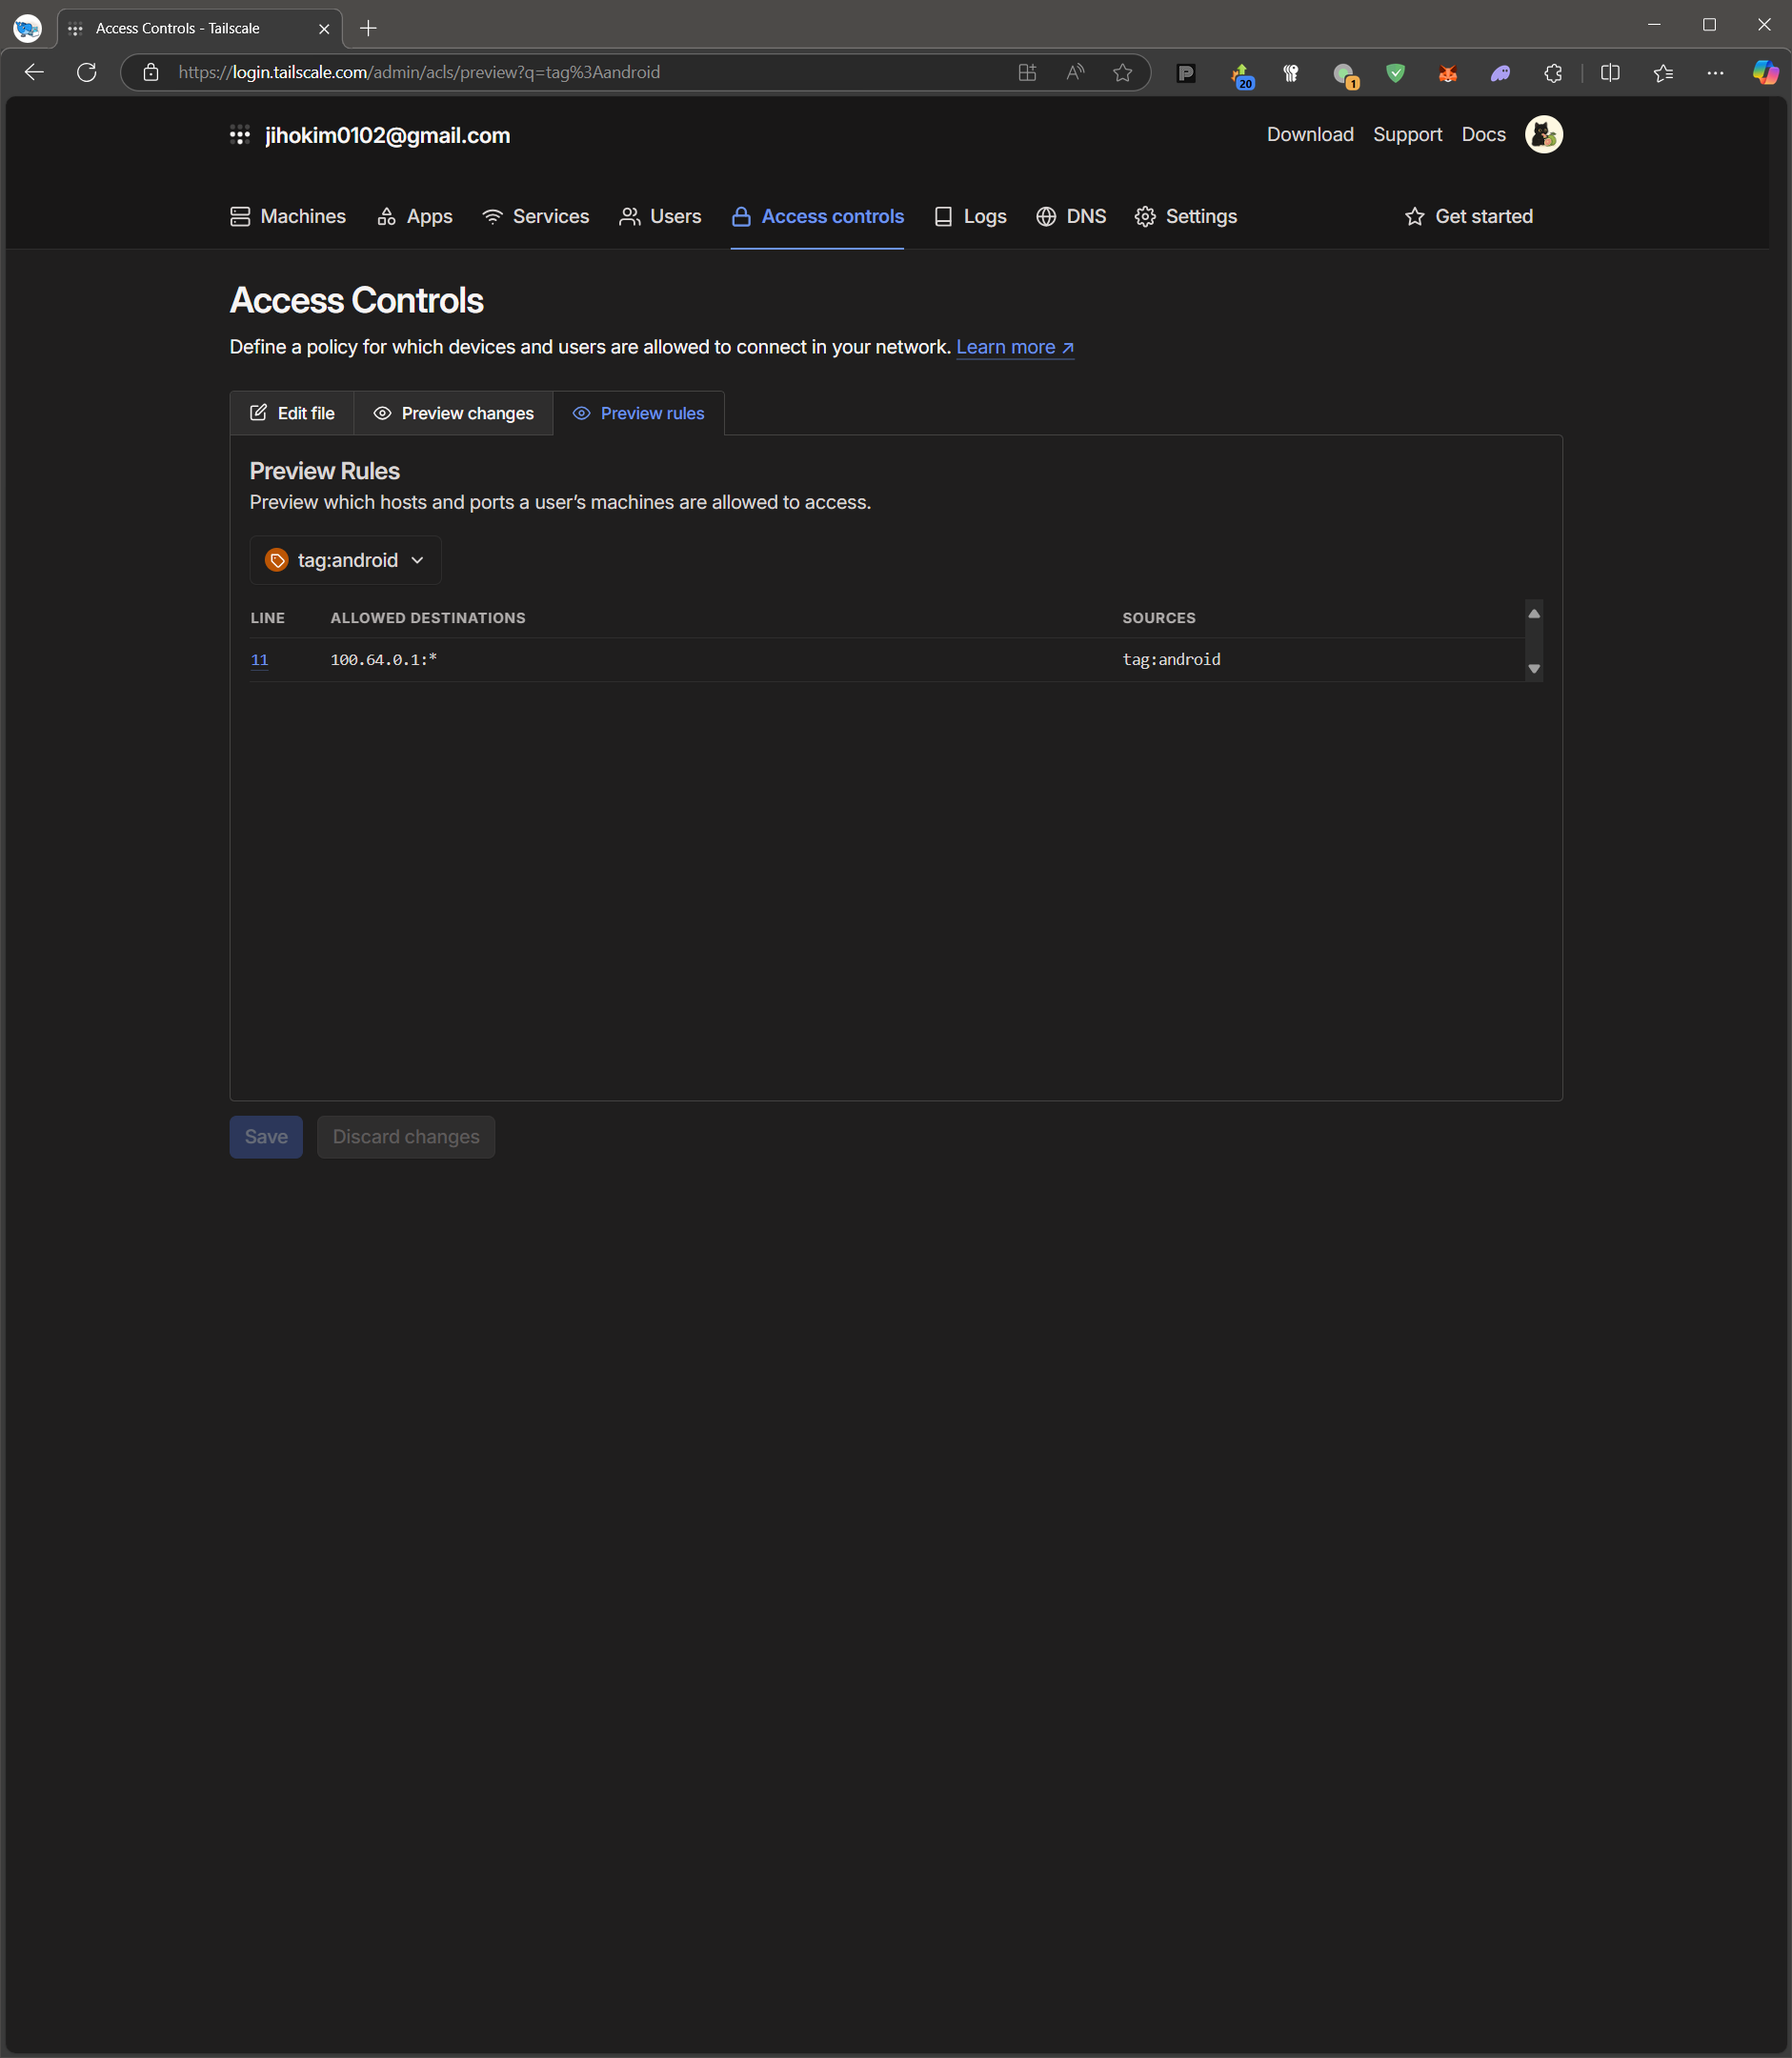 100.65.1.1(andorid) -> 100.64.0.1(nukumori)
실제 동작 테스트를 위해 ping을 날려본다.
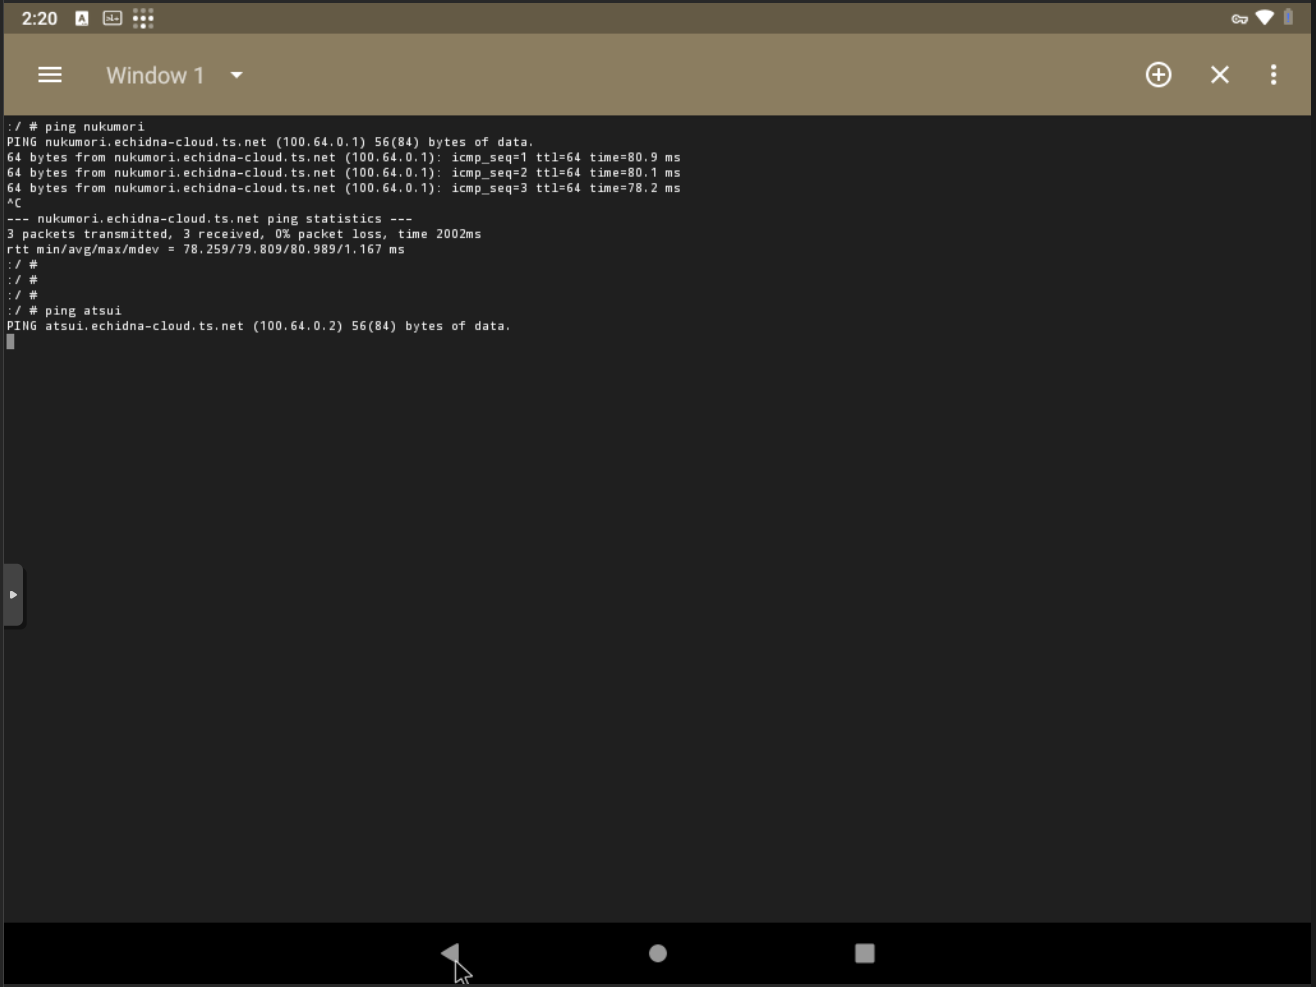 nukumori 만 ping 작동